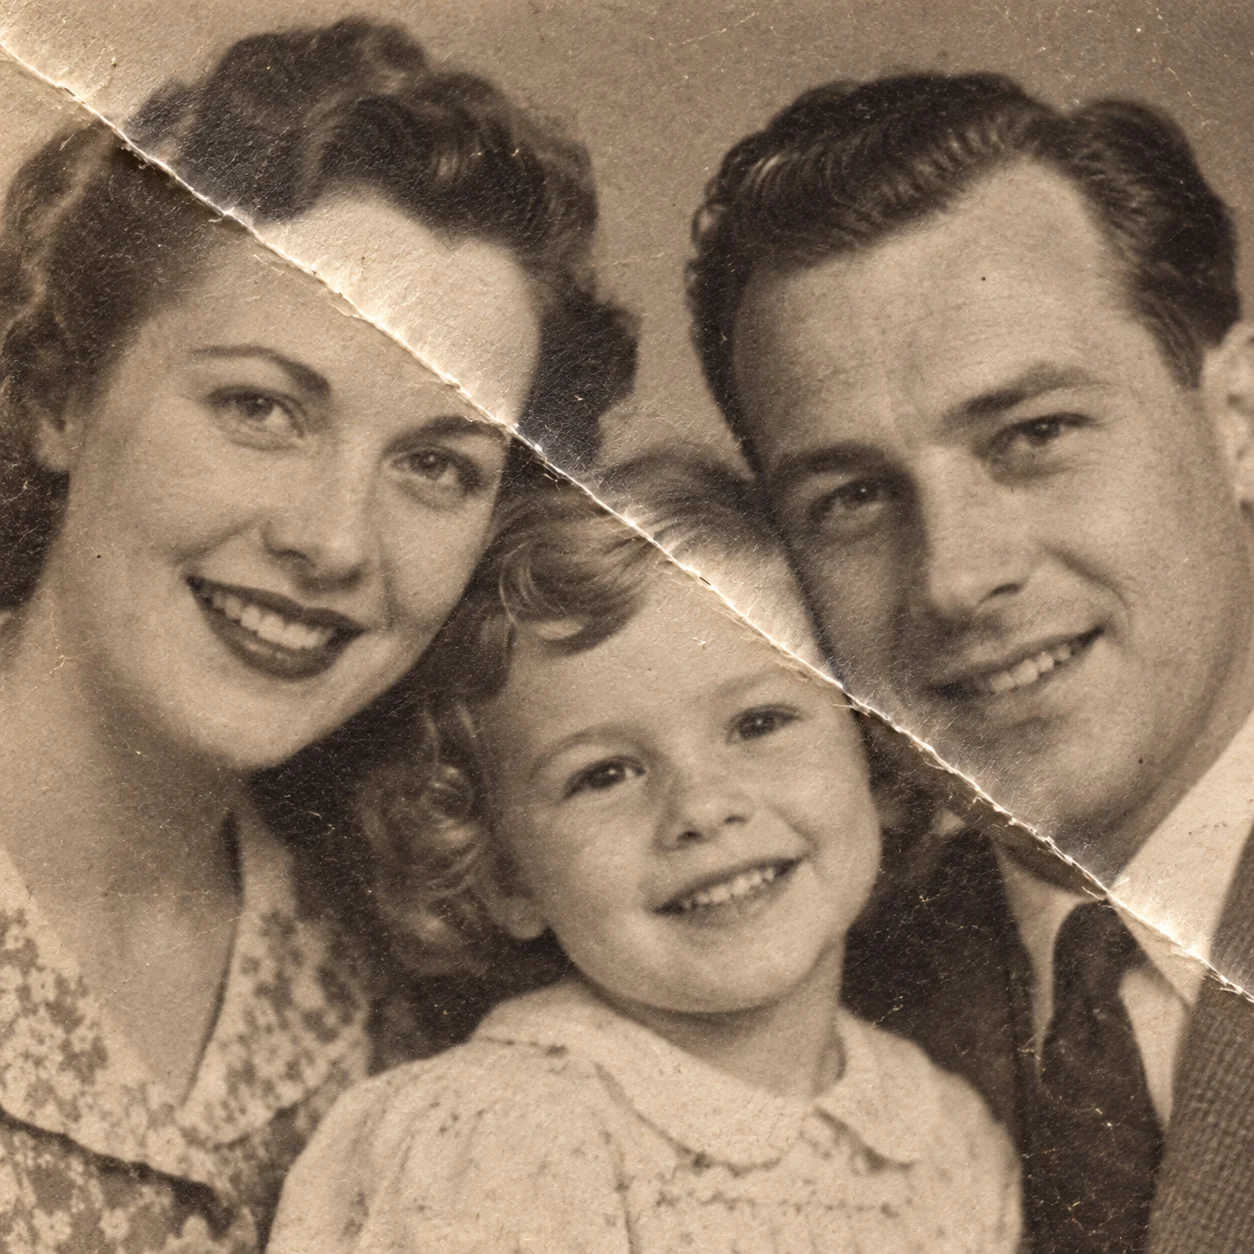
A crease in an old photograph usually appears in one of two ways. Sometimes the print itself is still folded or curled, so the paper no longer lies flat. Other times the paper has been pressed flat again, but the crease left a bright or dark band across the scanned image.
Both problems have solutions, but they are solved in different places. In this guide, you will learn how to remove creases from old photos in three stages: safely flattening the physical print, scanning it properly, and then removing the remaining crease lines digitally with AI restoration, Adobe Photoshop, or an online tool.
The most important thing to understand before you start is that most creases in a scan are a lighting problem, not a color problem. When paper folds, the surface angle changes, so the scanner light bounces off the crease differently and records it as a bright or dark band. Once you know that, the repair becomes much more logical: fix the light, then rebuild the texture.
You should also set a realistic expectation. A crease can be reduced dramatically, and in many cases the photo will look flat and natural again. But the image information that was physically folded away is gone. A tool can reconstruct it convincingly, yet the result is an interpretation, not a recovery.
Can You Remove Creases from Old Photos?
Yes, and the answer depends on which of two problems you actually have. If the print is still folded or curled, the paper can usually be flattened again with slow, careful handling. If the crease has already been captured in a scan, the visible line can almost always be removed or greatly reduced with digital retouching.
The difficulty varies a lot, so identify the crease before you choose a method:
| What the crease looks like | Likely type | Typical difficulty |
|---|---|---|
| The print is curved but has no hard line | Curling | Low — flattening alone may be enough |
| A single thin line across the image | Light fold | Low to medium |
| A wide bright or dark band | Deep fold with a changed surface angle | Medium |
| A white line with visible paper damage | Hard fold, broken paper base | High — detail may be missing |
| A crease running through a face | Deep fold in a critical area | High — needs careful review |
There is one honest limitation to keep in mind. Digital restoration cannot recover detail that was physically folded away and never captured in any scan. A tool can reconstruct it convincingly, but the result is an interpretation, not a recovery. Always compare the repaired image against the original.
Why Old Photos Get Creased
Creases come from three different kinds of physical stress, and they do not all behave the same way:
- A hard fold. The photo was folded once, deliberately or by accident. This creates a sharp line and often damages the paper fibers or the emulsion layer along that line.
- Long-term curling. The print was stored rolled, in a tight box, or leaning in an album. The paper slowly takes on a curve without a sharp line.
- Pressure marks. Heavy objects rested on the photo for years in a stack, leaving a soft dent or a shallow ridge.
If the photo also has surface damage, identify it correctly before you start, because the workflow is different. Thin lines are usually fold or scratch damage, small specks are dust, brown patches are stains, and jagged edges are tears. See how to remove scratches from old photos, removing dust from photos, and removing photo stains for those specific problems.
Before You Start: Do Not Work on Your Only Copy
Two rules protect your photograph, and both are easy to follow.
First, make a digital backup before you do anything physical. Photograph the print as it is right now, or scan it unflattened. Store that file somewhere separate.
Second, never overwrite your original scan. Digital editing is reversible and safe, but flattening a physical print is not. If you press, humidify, or heat a photograph, you cannot undo it.
If the photograph is genuinely valuable — a historical document, a very old or fragile print, or the only surviving copy of an important image — stop here and talk to a professional conservator. The techniques below are appropriate for ordinary family photographs, not for museum pieces.
Step 1: Safely Flatten the Photo Before You Scan
If the print is still creased or curled, flattening it first makes everything afterward easier. A flat original produces a scan with less distortion, and the brightness band caused by a fold becomes much weaker.
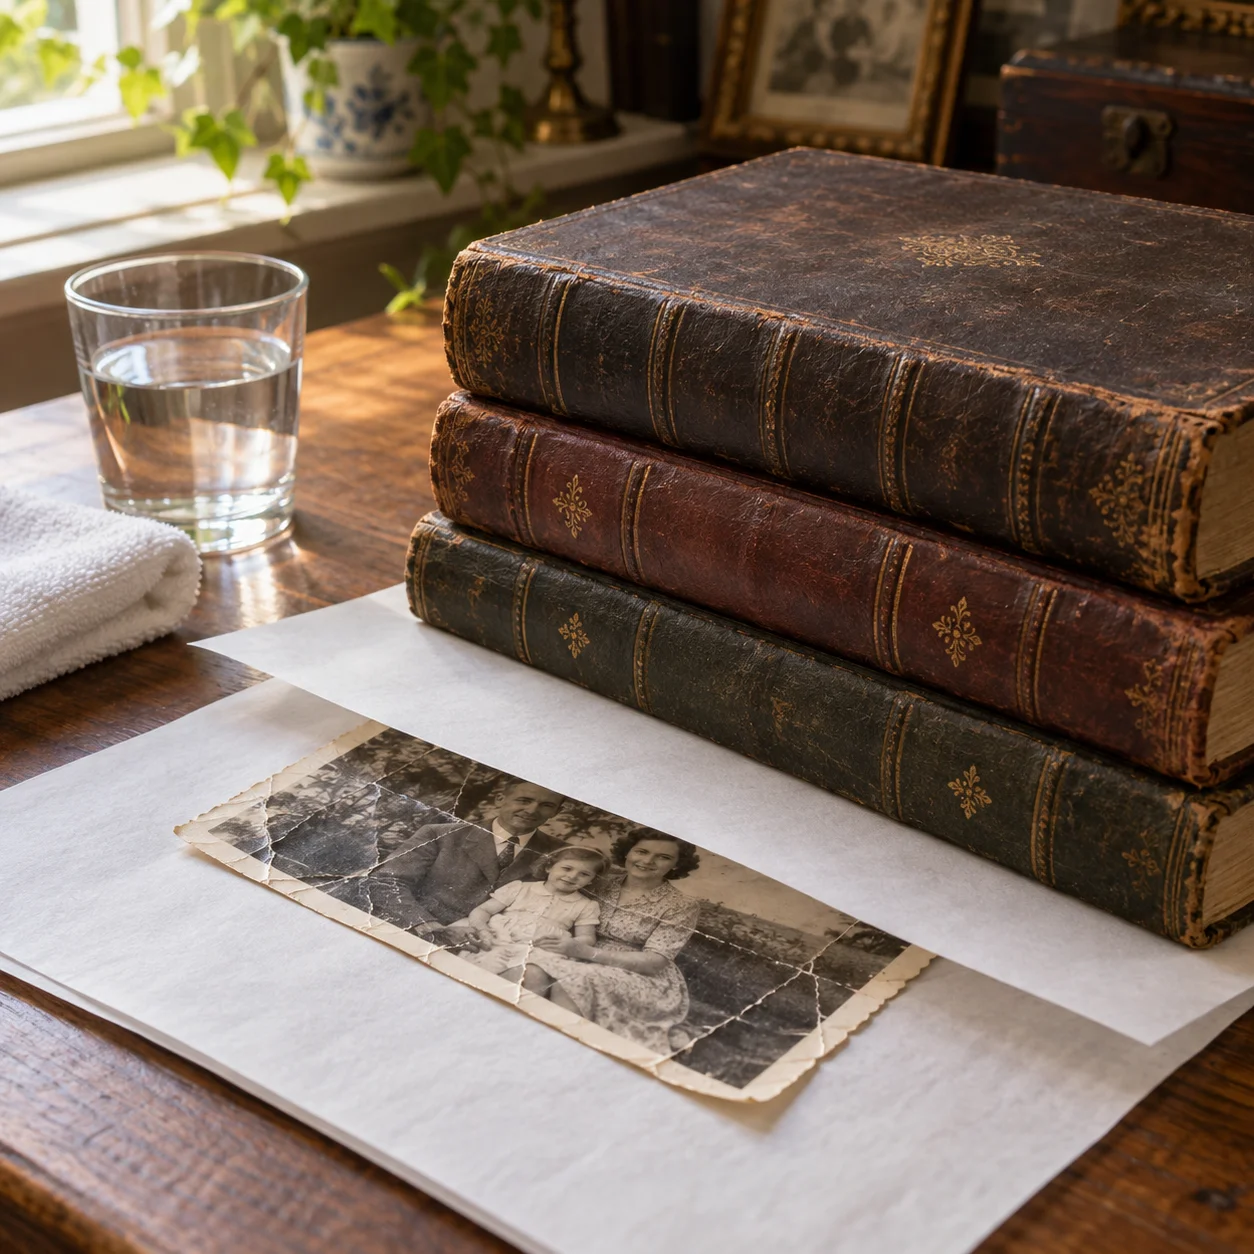
The Safe Method: Humidity and Weight
This is the standard approach used for curled and lightly creased prints, and it works because paper fibers soften with moisture and then set in a new shape under pressure.
- Place a slightly damp — not wet — towel in the bottom of a sealed plastic container.
- Put a raised rack or a few small supports above the towel so the photograph never touches the water.
- Lay the photo on the rack, close the container, and leave it for a few hours up to a day. The air inside becomes humid and the paper relaxes.
- Remove the photo and immediately sandwich it between two sheets of acid-free paper or clean blotting paper.
- Place the sandwich under a flat, heavy weight such as a stack of books or a board with weights. Leave it for several days, replacing the paper occasionally if it becomes damp.
This is how to safely flatten old photos without heat or chemicals. It is slow, and that is the point. Speed is where damage happens.
The dry method. If the print is only slightly bowed and has no hard line, skip the humidity and simply press it between acid-free paper and heavy books for a week or two. It is the least risky option available.
How to Flatten Old Photos That Have Curled
Curled prints need a different approach from sharply folded ones. Do not bend a curled photo back the other way in one movement, because that creates a new crease on the opposite side.
Instead, work in stages:
- Roll the photo gently in the reverse direction, but only a small amount — enough to reduce the curve slightly, not to flatten it.
- Hold it in that position with an acid-free paper tube or a clean cardboard tube, and support it with weights rather than elastic bands, which can leave marks.
- Wait one or two days, then increase the reverse curve slightly and repeat.
- Finish with the humidity-and-weight method above to set the new shape.
For a noticeably warped print, the same logic applies at a slower pace. If you are researching how to uncurl old photos or how to straighten old photos, the answer is almost always patience plus gentle, repeated pressure, not a single strong correction.
What Not to Do: Read This Before You Try an Iron
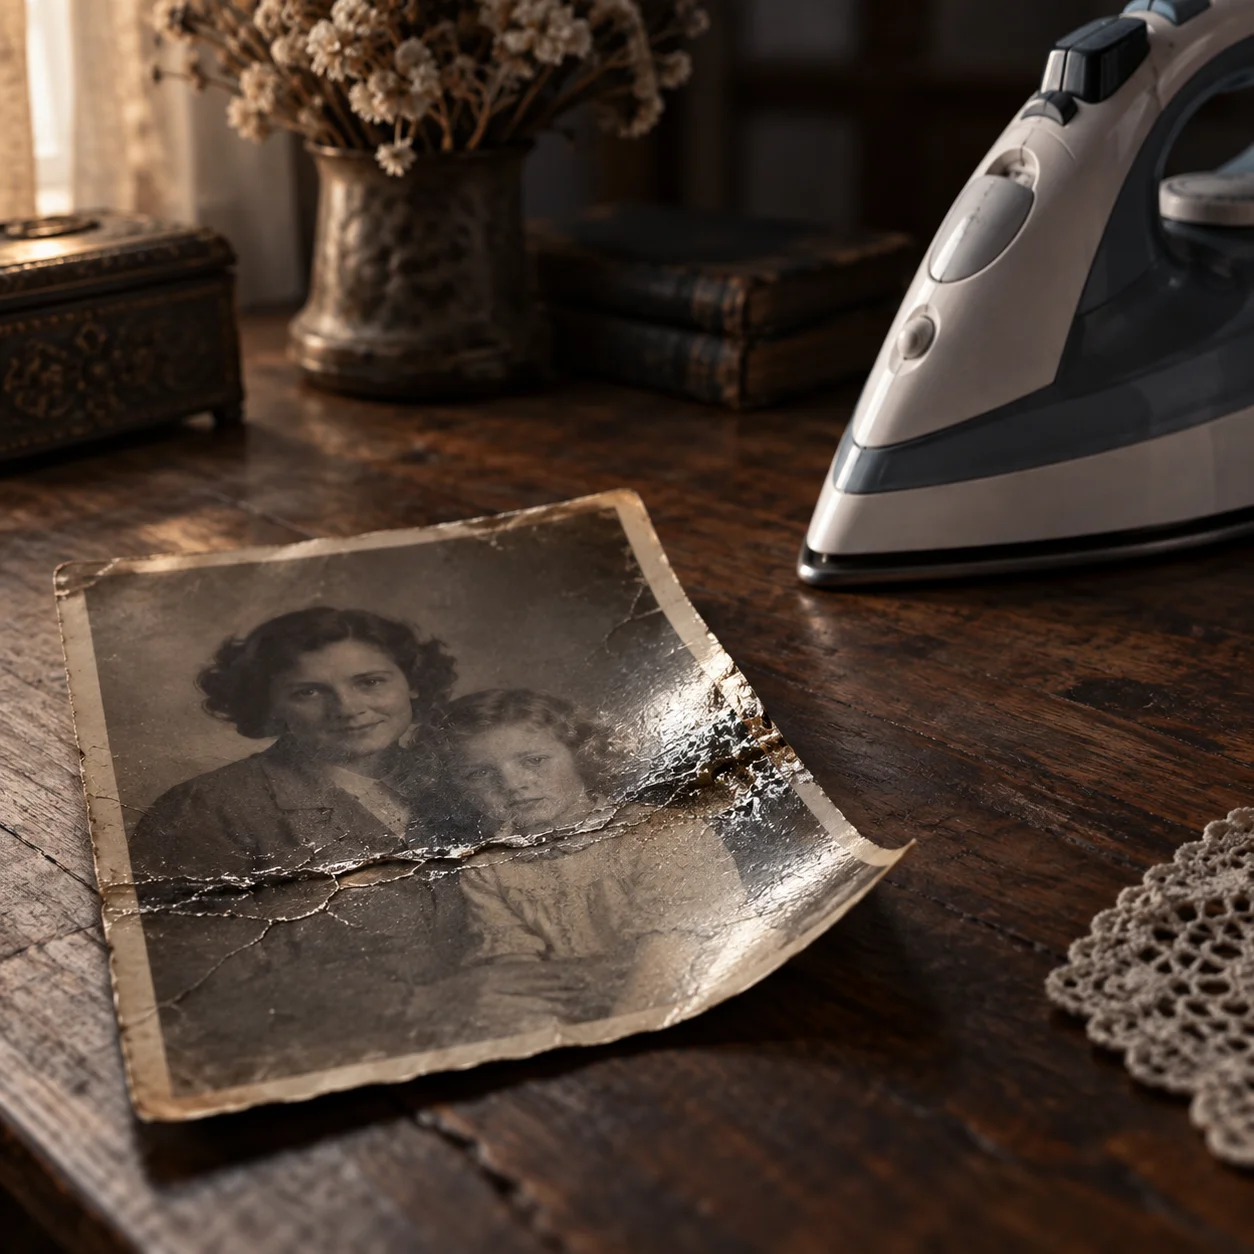
This section matters more than the rest of the article. Several popular methods for flattening photographs cause permanent damage, and the damage usually appears weeks later rather than immediately.
Do not iron a photograph directly. A household iron has poor temperature control, and photographic emulsions soften at low temperatures. Direct heat can melt the emulsion layer, cause silvering (a metallic mirror-like sheen), and make the paper base brittle. Thermal damage is irreversible and often invisible until the print starts to crack.
If you decide to try a low-heat iron anyway, on a photo you can afford to lose, use all of these precautions together:
- Place the photograph face down between two sheets of clean, smooth card stock. Never touch the iron to the image surface.
- Turn steam off completely. Moisture plus heat is worse than either alone.
- Use the lowest heat setting, and lift and move the iron constantly rather than resting it in one place.
- Test on a corner first, and stop immediately if you see any gloss change, ripple, or color shift.
Also avoid these entirely:
- Direct sunlight, which fades and warps
- Hair dryers and heat guns, which heat unevenly and fast
- Microwave ovens or conventional ovens
- Soaking the print in water, which can lift the emulsion layer off the paper
- Tape, glue, or adhesive strips of any kind
- Spraying water directly onto the photograph
A useful rule: any method described as "fast" is a method that is gambling with your photograph.
Should You Flatten First or Scan First?
Flatten first, then scan — unless the print is too fragile to handle.
The reason is simple. A folded surface creates a brightness band that hides detail underneath it. If you flatten the print before scanning, the band becomes weaker or disappears entirely, and your digital repair becomes far easier.
The exception matters just as much. If the photograph is brittle, has visible cracks along the fold, or feels stiff and dry, do not manipulate it. Scan it as it is and handle everything digitally. In that situation, physical flattening risks breaking the print, which is a much worse outcome than a crease.
Step 2: Scan the Flattened Photo Properly
Your scan quality sets the ceiling for everything that follows. This step is where a small amount of care saves a large amount of editing time.
Use a flatbed scanner if you have one. A dedicated scanner gives even lighting and consistent focus. A phone photo is workable when you have no alternative, but it introduces uneven illumination and perspective distortion that make crease repair harder.
Scan at a high enough resolution. Start at 600 dpi. Use 1200 dpi for small prints, or when you plan to enlarge the restored image for printing. Higher resolution gives a repair tool more real pixels to work with, which produces more natural texture.
Choose the right file format. Save as 24-bit color in TIFF or a high-quality PNG. Avoid JPEG, because compression artifacts create small blocky patterns that are easily mistaken for damage and can be amplified during restoration.
Keep the print flat during scanning. Placing a sheet of clean glass or acrylic over the photo holds it flat, but watch for two problems: reflections from the scanner light, and Newton's rings, the faint rainbow-colored interference patterns that appear when glass sits too close to a glossy surface. A very clean sheet raised slightly off the print avoids most of this.
Do not crop or rotate during scanning. Keep the full frame, and make those decisions later when you can see the results.
If the photograph also needs color correction, exposure fixes, or sharpening, hold off. Repair the crease first. See how to restore old photos for the broader restoration workflow, and restore faded photos if fading is also present.
Step 3: Remove the Crease Lines Digitally
Now you are working with a flat scan that still shows a crease line. This is the part most people mean when they search for how to remove creases from a scanned photo.
Before choosing a method, understand the one rule that governs the whole process:
Repair the crease before you adjust color, contrast, or exposure.
The crease is a brightness feature. If you change the overall tonal balance first, the relationship between the crease and its surroundings changes, and any repair you already made may become visible again. Fix the light first, then grade the image.
Method 1: Remove Creases with AI Restoration
AI restoration is the fastest option when a photograph has many fine creases spread across the whole surface, or when you simply do not want to edit manually. This is the workflow to follow:
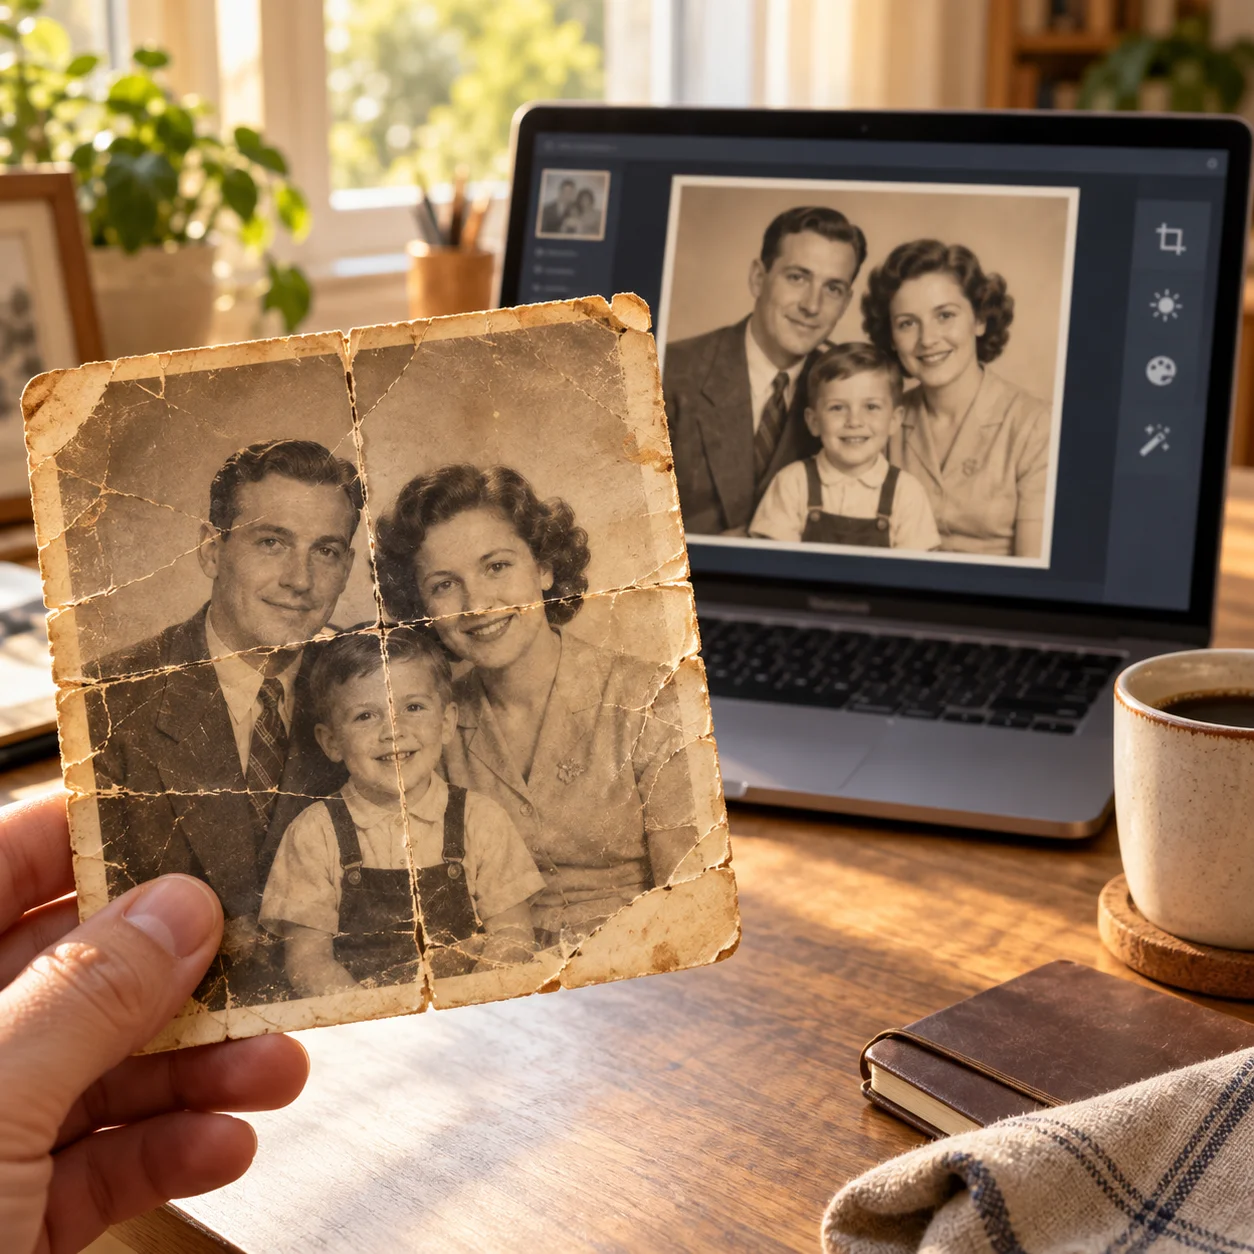
Step 1: Upload a Clean Scan
Use the highest-quality scan available. A sharp, flat scan gives the model more surrounding texture to work from, which produces a more convincing reconstruction.
Step 2: Let the AI Detect the Damaged Areas
The restoration model looks for patterns that do not match their surroundings. Crease bands, dust, fading, and cracks are often detected in the same pass. You usually do not need to select the crease manually.
Step 3: Review the Result at Full Size
Do not judge the output from a small preview. Zoom in and check the following:
- Faces, especially eyes, the bridge of the nose, and the corners of the mouth
- Hair edges and hairlines
- Hands and fingers
- Patterns on clothing, upholstery, or wallpaper
- Paper and film texture across flat areas such as walls and sky
The most common AI failure is over-smoothing. A crease disappears, but so does the skin texture around it, and the photograph starts to look plastic. If skin pores, fabric weave, or paper grain have vanished, the repair has gone too far.
Step 4: Download a Separate Copy
Save the result as a new file and keep the original scan untouched. If you plan further editing, keep a high-quality master and export smaller copies only for sharing.
If you want to remove creases from old photos automatically, you can try our AI photo restoration tool to upload the scan, process the damage, and review the result. AI is a strong starting point, but the reconstruction is still an estimate and always deserves a human check.
Method 2: Remove Creases in Photoshop
Photoshop is the better choice when there are only a few creases, when they are concentrated in one area, or when a crease crosses a face and you need precise control. It takes longer, but you decide exactly what is preserved.
This is the workflow for how to remove fold lines in Photoshop, and it works because it targets the actual cause of the crease.
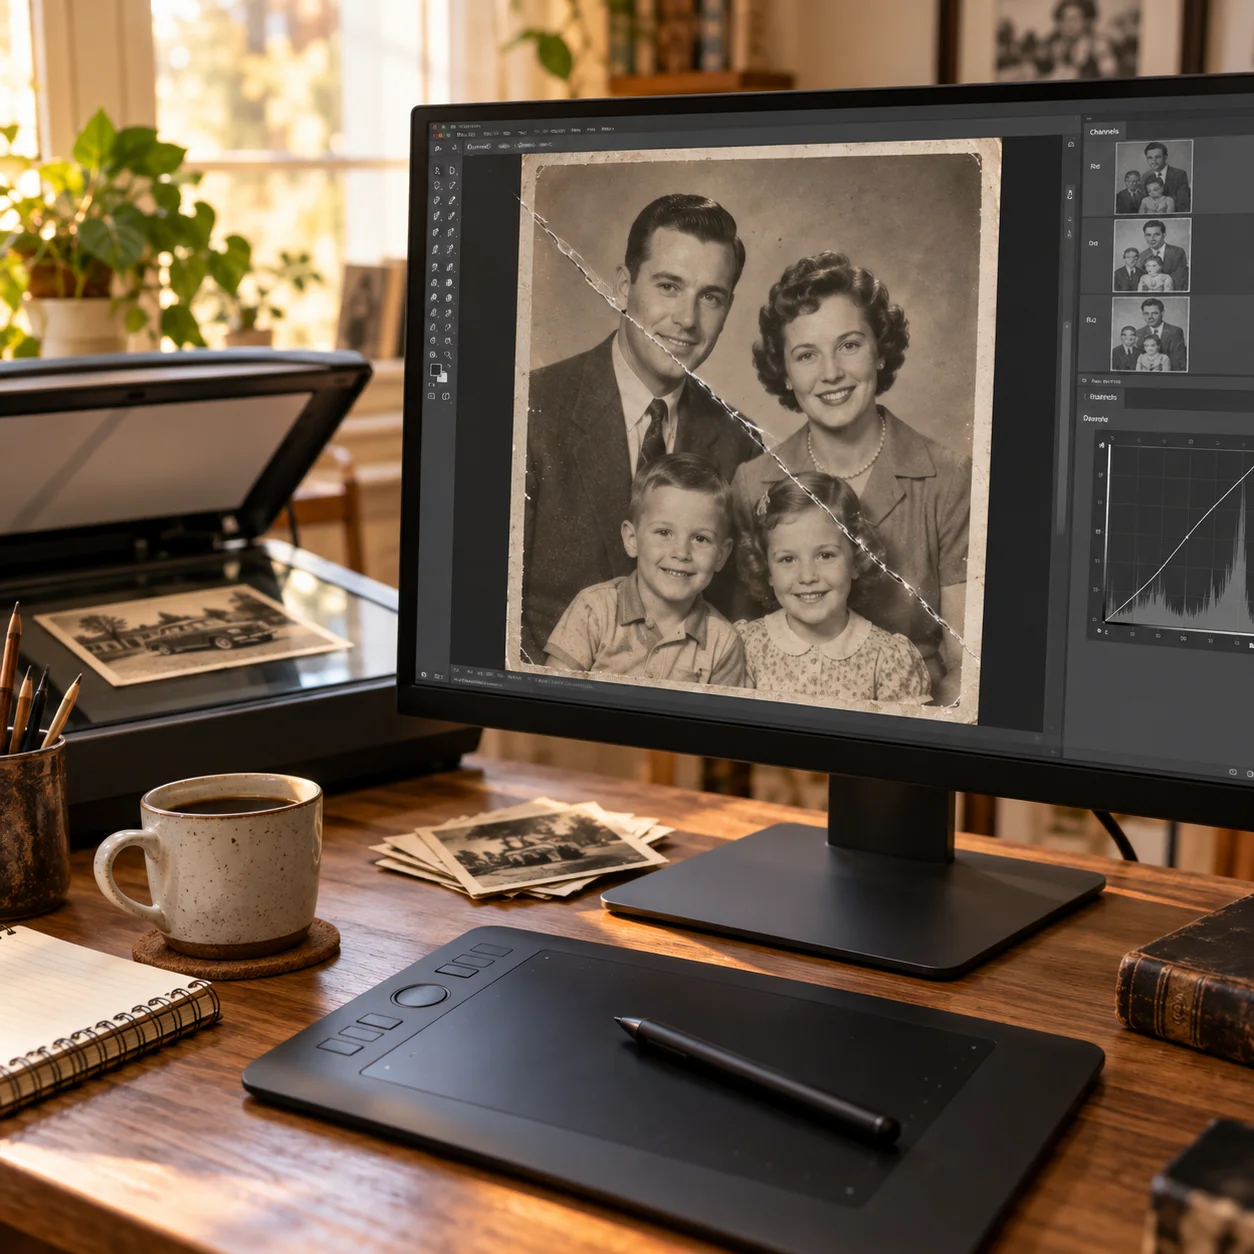
1. Duplicate the Layer and Check Each Channel
Open the high-resolution scan and duplicate the background layer so the original pixels stay intact. Then look at the red, green, and blue channels separately.
A crease is rarely equally visible in all three. In many scans it is strongest in one channel, which is good news: repairing that single channel affects the color far less and preserves more of the original detail.
2. Correct the Brightness of the Crease Band
Add a Curves or Levels adjustment and bring the crease band back to the brightness of the surrounding area. Work in small increments and compare to the surrounding tone constantly.
This one step removes most of what the eye reads as a crease, because the eye is responding to the discontinuity in brightness rather than to the physical line itself.
3. Rebuild the Texture
After the brightness is even, what remains is a texture gap. Use the Healing Brush, Spot Healing Brush, or Clone Stamp in short strokes along the crease:
- Keep the brush only slightly wider than the remaining line.
- Sample from nearby areas with similar texture direction. Fabric weave, hair, and wood grain all have a direction, and a repair that runs against it looks wrong even when the tone matches.
- Resample frequently so you do not repeat the same patch of texture.
- Lower the opacity and build the repair up in passes rather than trying to finish in one stroke.
Avoid running the Dust & Scratches filter across the whole image. It removes the crease, but it removes every other texture too. If you use it at all, keep the radius small and apply it through a mask limited to the crease itself.
4. Handle a Crease That Crosses a Face
This is the hardest case and it deserves its own approach:
- Never pull one long stroke across a face.
- Work in small segments, and stop at each feature boundary.
- When you reach an eye, a nostril, or the edge of a lip, reduce the brush size and switch to sampling from the matching feature rather than the surrounding skin.
- Compare against the original layer repeatedly as you work.
5. Common Photoshop Mistakes
- Sampling too large an area creates an obvious smeared patch that is more distracting than the crease was.
- Blurring over the crease makes the local area look out of focus.
- Sharpening after repairing re-emphasizes the crease and any repair artifacts around it.
- Editing the original layer removes your ability to compare or start over.
- Judging only at one zoom level. Check at 200% for texture, at 100% for technique, and zoomed out for overall balance.
Method 3: Remove Creases with Online Tools
Online tools are convenient when you do not want to install software or learn a manual workflow. The process is straightforward: open the tool, upload the scan, select photo restoration, compare the preview with the original, and download the result.

Before uploading a family photograph, check four things:
- Output resolution. Many free tools quietly reduce the image size on download.
- File retention. Whether your photo is stored, for how long, and whether it is deleted.
- Watermarks. Whether the free result carries one.
- Automatic face enhancement. Some tools silently "improve" faces, which is exactly what you do not want on an old portrait.
Free options are useful for testing, and remove creases from old photos online is a reasonable starting point for a single image. Just check the result at full size before you rely on it for printing or archiving.
Which Crease Removal Method Should You Use?
| Your situation | Best starting point | Why |
|---|---|---|
| The print is curled but has no hard line | Physical flattening only | No digital repair is needed |
| One thin crease line | Flatten, then Photoshop | A manual repair is the most precise |
| Many fine creases across the surface | AI restoration | Too many areas to edit by hand |
| A wide band with obvious brightness change | Photoshop with channels and curves | A brightness problem needs a brightness tool |
| A crease running across a face | AI first, then Photoshop review | Neither method alone is reliable here |
| A hard fold with a broken paper base | AI reconstruction plus manual work | Original detail is missing and must be estimated |
| A brittle print you are afraid to handle | Scan as-is, repair digitally | Physical handling is too risky |
For most people, the practical answer is to flatten what can be flattened safely, scan well, try an AI pass, and then use Photoshop only where the automatic result is not convincing enough.
How to Handle a Crease That Runs Across a Face
A crease through a face is the situation where restoration most often goes wrong, because there is no way to verify the result from the damaged image alone.
Use this approach:
- Gather other photographs of the same person, ideally from around the same period, and use them as a reference for the original features.
- Restrict any AI pass to reconstructing the local area rather than redrawing the whole face.
- After editing, zoom in and compare each feature boundary the crease passed through: eyes, eyebrows, nose, mouth, jawline, and ears.
- Check that the repaired area has the same texture and grain as the untouched skin around it.
Be honest with yourself about the limit here. If a section of the image was physically folded away and no other copy exists, no tool can recover it. What you get is a plausible reconstruction. Describing it that way — to yourself and to family members — is more accurate than calling it a restoration of the original.
How to Keep the Restoration From Looking Fake
Over-restoration is the most common problem in old photo repair, and it is usually caused by doing too much rather than too little.
A well-restored photograph should still look like a photograph:
- Skin should still show pores and fine texture
- Fabric should still show weave
- Paper and film should still show their original grain
- Edges should not be smoothed into soft halos
Three checks catch most problems:
- Compare side by side. Place the original and the repaired version next to each other at 200% and look at the texture, not just the crease.
- Cover the faces. Look only at backgrounds, walls, and open areas. If those look unnaturally smooth, the whole image is over-processed.
- Ask the honest question. Does this look like a repaired old photograph, or does it look like a digital illustration of the same scene? If it is the second one, reduce the strength and start again from the original scan.
Tips for Better Crease Removal Results
Use a High-Quality Scan
Every repair is limited by the scan underneath it. Clean the scanner glass, align the print, avoid glare and shadows, and capture at 600 dpi or higher before you edit anything.
Keep the Original Photo and Scan
Keep the physical print, an unedited flat scan, and the working file. Storage is cheap; family photographs are not replaceable.
Repair Creases Before Color Correction
Creases are brightness features, so repairing them after a color adjustment often undoes the adjustment or makes the crease reappear. Flatten the light first, then correct tone and color.
Do Not Remove Every Sign of Age
Natural grain, slight tonal variation, and a gentle warm cast are part of what makes an old photograph feel like an old photograph. The goal is to remove what distracts from the image, not to make a 1950s print look like it was taken yesterday.
Work at More Than One Zoom Level
Repairs that look perfect at 200% can produce visible smearing when the whole photograph is viewed at normal size. Always step back and check the full image.
Repair Physical Damage Before Upscaling
Enlarging or sharpening a creased scan makes the crease more prominent and can cause an enhancement tool to treat the damage as genuine detail. Fix the crease first.
Frequently Asked Questions
Can you remove creases from an old photo?
Yes, with an important distinction. Creases in the paper can be greatly reduced by careful flattening, but a hard fold that has damaged the paper base cannot be fully erased. Crease lines in a scanned image, by contrast, can usually be removed almost completely. The result also depends on how deep the fold is and whether it crosses an important area such as a face.
How do I get creases out of old photos without damaging them?
Use the slowest method available. Humidify the print gently in a sealed container with a damp towel nearby — never touching the photo — then press it between acid-free paper under a heavy weight for several days. Avoid ironing, direct sunlight, hair dryers, soaking in water, and any kind of tape or adhesive. If the photograph is very old or fragile, ask a professional conservator instead.
Should I flatten the photo before or after scanning?
Flatten first whenever it is safe, because a folded surface creates a brightness band that hides detail in the scan. If the print is brittle, cracked, or stiff, do not handle it: scan it as it is and remove the crease digitally instead.
How do you remove creases from a scanned photo?
Treat the crease as a brightness problem. In Photoshop, inspect the RGB channels separately, use Curves or Levels to bring the crease band back to the surrounding tone, and then rebuild the texture with the Healing Brush or Clone Stamp in short strokes. If the crease is one of many fine lines, an AI restoration pass is usually faster. Always work on a copy and keep the original scan unchanged.
Can you remove creases from a photo in Photoshop?
Yes, and for a single crease Photoshop is often more accurate than an automatic tool because you control exactly what is preserved. The key is the order of operations: fix the brightness first, then the texture. Avoid the Dust & Scratches filter across the whole image, and use small segmented strokes rather than one long one when the crease crosses a face.
Can you iron an old photo to remove creases?
It is generally not recommended, because the risk is permanent and the benefit is small. Household irons have imprecise temperature control, and photographic emulsions can soften and melt at low temperatures, causing silvering and eventually cracking. If you attempt it on a photo you can afford to lose, place the print face down between clean card stock, turn steam off, use the lowest setting, test a corner first, and stop at the first sign of change. Gentle humidification and weight are the safer route.
Can you remove creases from old photos online for free?
Yes, several online services can reduce or remove crease lines, and free tiers are useful for a single photo. Be aware of the usual limits: reduced output resolution, watermarks, a small number of free images, and unclear file retention. Check whether the tool applies automatic face enhancement, since that can make an old portrait look unlike the person. Review the full-size result before using it for printing or archiving.
Will removing a crease change the original photo?
Digital repair does not touch the physical print, so the original is unaffected — but physical flattening is not reversible. Digital repair also permanently changes pixels, and an aggressive repair can remove skin texture, fabric weave, and paper grain along with the crease. Keep an untouched scan and never overwrite it.
Can AI remove creases from old photos?
Yes, AI handles creases well, particularly when there are many of them across the whole surface. The important limitation is that AI reconstructs rather than recovers. The detail hidden inside a fold was never captured, so the model estimates it. Typical failure modes are over-smoothing, lost skin texture, and faces that no longer resemble the person. Always compare the result against the original.
What if the crease goes right across someone's face?
Reference other photographs of the same person to confirm the original features, restrict the repair to local reconstruction, and then compare every feature boundary the crease crossed at high zoom. If the information is genuinely missing, accept the result as an informed approximation and say so when you share the image.
How long does it take to flatten an old photo?
Humidifying a curled print takes a few hours to a day, and pressing it flat takes several days to a few weeks, with the blotting paper changed periodically. A heavily curled print may need several rounds, each reversing the curve only slightly. The time is the safety margin.
Do I need to scan the photo at a higher resolution for crease repair?
Yes. Scan at 600 dpi as a minimum, and use 1200 dpi for small prints or if you plan to enlarge the restored image. Save as TIFF or high-quality PNG rather than JPEG. More real pixels give any repair method more texture to rebuild from, which is what keeps the result from looking smooth and artificial.
Conclusion
Removing creases from an old photo is a three-part process, and the order matters: flatten the physical print as safely as you can, scan it at high resolution, and then repair the remaining crease lines digitally.
AI restoration is the easiest option when creases are numerous and spread across the image. Photoshop gives you precision when a single crease needs careful treatment, especially across a face. Online tools are convenient for a quick single repair, provided you check the resolution, watermark, and privacy terms first.
Whichever route you take, keep the original print and an unedited scan, repair the light before the color, and resist the urge to smooth everything. The best crease repair is one that removes the distraction and leaves the photograph looking like itself.
If you would rather not do this by hand, you can try our AI photo restoration tool to upload your scan, remove the crease lines, and review the result before downloading.